The Review Funnel is the main feature of Starfish Reviews. It’s designed to get you more reviews on review platforms from around the web.
A Review Funnel is a multiple choice question that uses an if/then functionality. This means you can change the message you display based on a customer’s response to your initial question in the Funnel.
That initial question could be as simple as “How would you rate our business?”
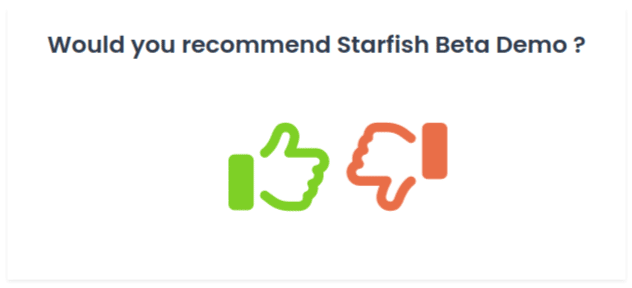
If they give a positive response, then ask them to leave a review.
If they give a negative response, then encourage them to contact support or provide feedback.
In this post, I’m going to show you how you can get the most out of the Review Funnel feature.
Starfish Reviews Premium lets you create between 5 and an unlimited number of funnels depending on the plan you have, so sign up today to get the most out of your Review Funnels.
When and Where to Use a Review Funnel
There are two main places that you can put a review funnel:
- Insert it on an existing page.
- Create a dedicated Review Funnel page.
Both options will result in more reviews and an increase in engagement among your customer base. Even so, they require different strategies and have their own use cases.
When to Add to an Existing Page
Consider inserting a Review Funnel on an existing page if your business is small but has a lot of repeat customers. Since your customers are constantly returning to your site, you have a higher chance of them interacting with the Funnel if you showcase it in this way.
Here are the best locations for your Review Funnel shortcode:
- Homepage – Underneath your pricing or call to action (CTA) section. Use a heading like “Already a customer? Share your feedback!”
- Contact Page – Place your Funnel underneath your contact form (not to be confused with the form where potential customers request a quote)
- Sign-in Page – A great place to catch returning customers. Place your Funnel beneath the form or to one side of it
- Sidebar – Simple way to add a Funnel to every page
- Footer – Another way to showcase your Funnel on every page
When to Use a Dedicated Review Funnel Page?
Alternatively, a dedicated Review Funnel page will enable you to target known customers instead of site visitors who may be customers.
You do this by marketing the page in specific ways:
- In an after-order or after-delivery email
- On flyers you hand out to customers
- On receipts
- On business cards
On physical handouts, use a QR code or a shortlink. Pretty Links is a simple shortlink option for WordPress users.
The best part about a dedicated Review Funnel page is how simple it is. There’s no header or footer nor any other elements that may distract visitors. There’s only your Review Funnel along with a few other elements meant to encourage customer feedback.
When to Use Both
Again, businesses who receive a lot of repeat customers should use both. This mainly includes cafes and restaurants as well as certain retail stores. Using both methods gives you more chances to receive customer feedback.
How to Create a Review Funnel
Let’s walk through the steps of creating a Review Funnel in case you’re new to Starfish Reviews.
- Create a new funnel
- Edit your positive review prompt
- Select a review destination
- Edit your negative response prompt
- Set up the negative feedback form
- Finish your funnel
Let’s run through each of these steps.
Step 1: Creating a New Review Funnel
Go to Starfish Reviews → Funnels to add a new Review Funnel.
Find the Question panel, and fill in the Yes/No Question field.
The default text is fine if you’re creating a Funnel for your business/product as a whole and your business/product name is the same as your site name.
However, you can make this question a touch more personal by switching out “{site-name}” for “us” to make “Would you recommend us?”
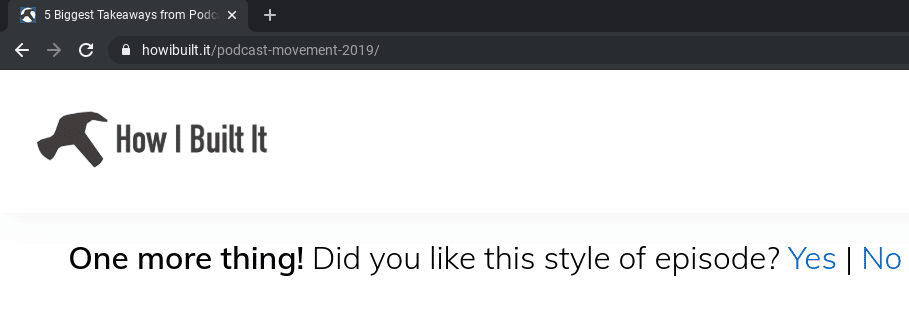
Consider creating different Funnels for different purposes, such as different products, business locations, or review platforms. For instance, Joe Casabona used Starfish Reviews to get more reviews on Apple Podcasts as well as feedback on each show’s style. He used this question: Did you like this style of episode?
Spray ‘n Coat Painting used Starfish Reviews to create Review Funnels for individual employees.
They then used this question: Would you recommend Daniel from Spray ‘n Coat?

Finally, choose a button style for your Funnel. Click the Preview button in the Publish panel to view it at full size.
Step 2: Editing Your Positive Review Prompt
Take a look at the Review Prompt box.

If the customer gives a positive response (the green thumbs up/smiley face/checkmark), then the program will display the message entered here.
The default message is “Excellent! Please Rate 5-stars …and leave a helpful review.”
The textbox accepts HTML code, so the H3 (Heading 3) tags surrounding the first half of the message make it appear larger than the rest.
Here a few possible alternatives in case you don’t want to push for 5-star reviews:
- Excellent! Please leave a helpful review on any of the platforms below.
- Thanks! Please leave us a review on Google!
- Thank you for your response! Consider sharing your experience on your favorite review platform!
Step 3: Selecting a review destination
When you say “please leave us a review,” choose how many review platforms you want to suggest leaving a review on with the Number of Destinations setting: Single or Multiple.
For a single destination, insert your personal URL for that platform’s profile page.
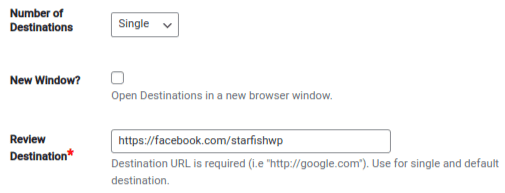
Also, enter the text you want to display on the CTA button. “Submit Review” is the default option.
For multiple destinations, start by choosing an initial destination with the Select Icon option.
Each icon displays in gray tones by default.
Here’s a mini cheatsheet of colors for the web’s most popular review platforms:
- Google
- Color: #FFFFFF
- Background: #EA4335
- Facebook
- Color: #FFFFFF
- Background: #4267B2
- Yelp
- Color: #FFFFFF
- Background: #F43939
Enter the platform’s brand name in the Name field, such as “Facebook” for Facebook. Enable the Hide from Display option if you only want to show icons.
Finally, enter the URL for your profile page in the Review URL field.
Click the green plus + button to add another platform.

Step 4: Editing Your Negative Response Prompt
Here’s the default message that appears when customers choose a negative response, meaning they click the red thumbs down, frowny face or x button:
“We’re sorry we didn’t meet expectations! How can we do better in the future?”
You’ll do just fine with this message, but feel free to switch up.
Here are a few examples:
- We’re sorry! Let us know how we can improve.
- We’re sorry! Please let us know what we did wrong.
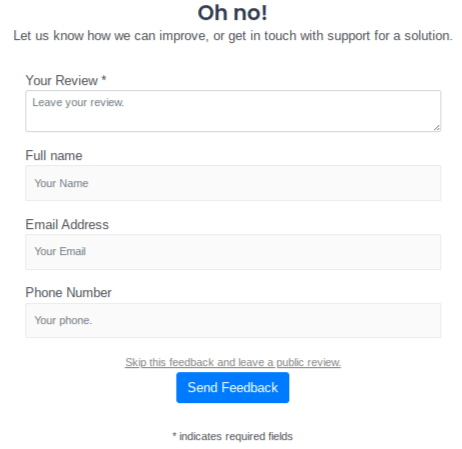
- Oh no! Let us know how we can improve, or get in touch with support for a solution.
Step 5: Setting Up the Negative Feedback Form
Starfish Reviews has a small contact form that appears when customers give a negative response to your initial question.
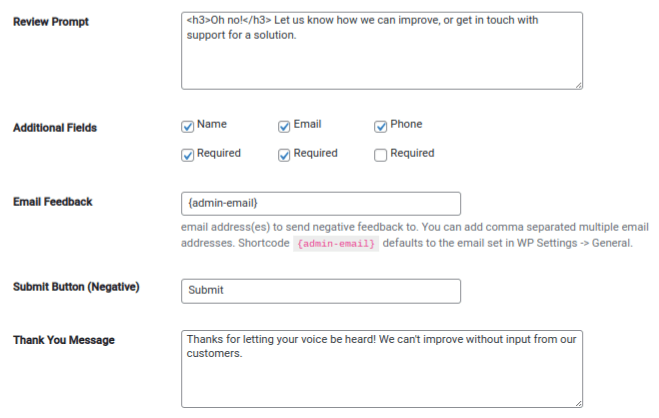
Here are the settings you can configure for it:
- Additional Fields: Name, Email, Phone Number (make name and email required).
- Email Feedback: Controls which inbox customer feedback gets sent to. Enter a different email address if you don’t want it sent to the email address assigned to your WordPress admin account.
- Submit Button: The default “Send Feedback” text works great, but again, feel free to change it to “Submit”, “Submit Feedback” or something different.
- Thank You Message: The message that appears when customers submit their feedback. Feel free to change this as well. Example: “Thanks for letting your voice be heard! We can’t improve without input from our customers.”
Step 6: Finishing Your Funnel
There’s a setting we need to discuss briefly before we move on: review gating. Review gating happens when you only ask for reviews from customers who provide positive feedback.
Our plugin allows you to do this, but we also have an option in the Negative Response panel that enables you to disable review gating. This is because review gating is in direct violation of the review policies used by many of the web’s top review platforms.
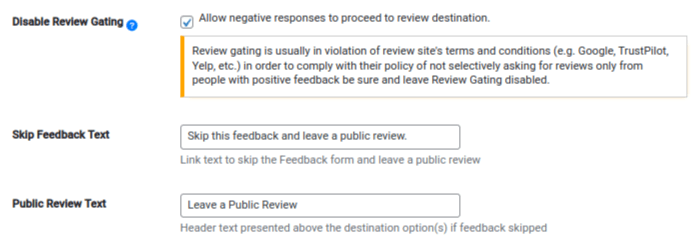
With review gating disabled, a link appears above the Submit Feedback button. By default, it says “Skip this feedback and leave a public review.” When customers click this link, buttons for the platforms you set up in the Positive Response panel appear instead.
Review gating is disabled by default to ensure our customers do not violate the terms and conditions of review policies from platforms like Google, Yelp and Trustpilot.
Once you’ve configured your review gating settings, give your Review Funnel a descriptive name, then publish it.
How to Add a Review Funnel to an Existing Page
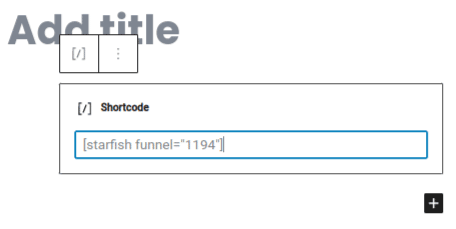
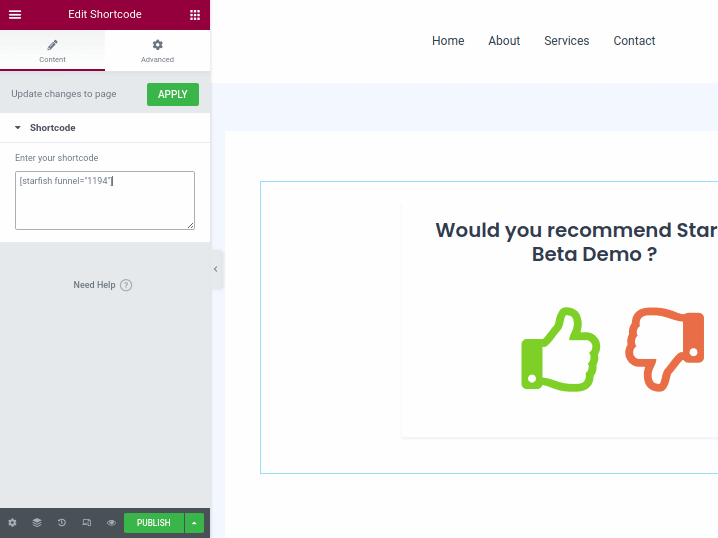
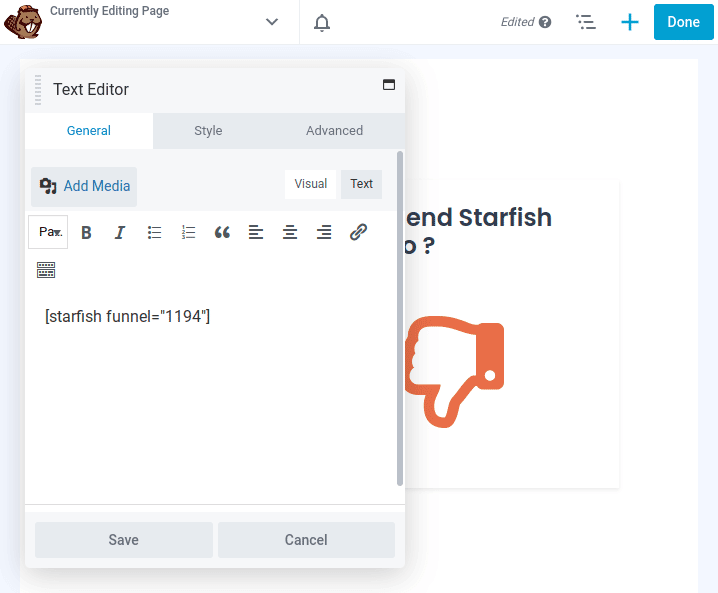
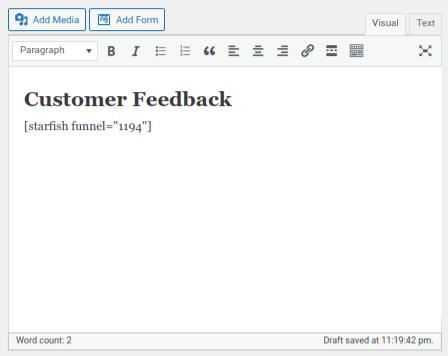
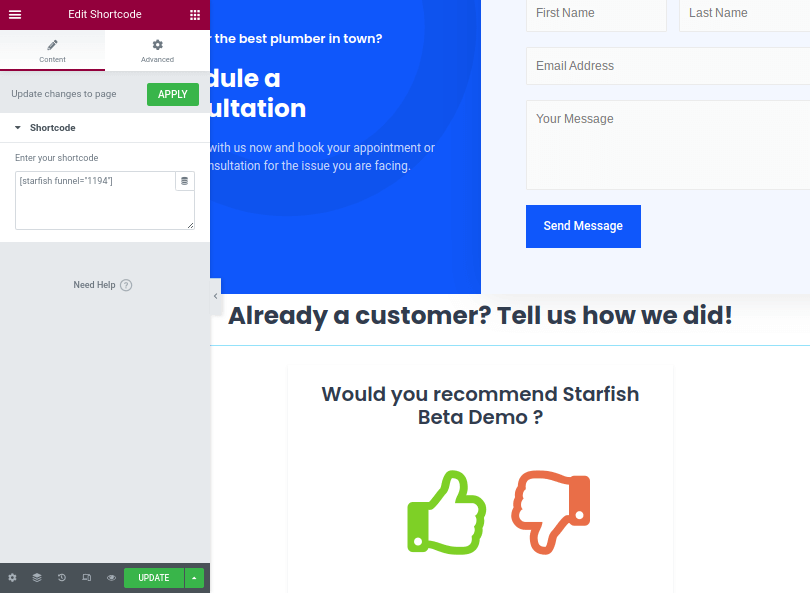
We display a Review Funnel with a simple shortcode. That means you can display a Funnel anywhere shortcodes are accepted in WordPress.
To find your Funnel’s shortcode, look in the Funnel Tool panel of the edit page or go to Starfish Reviews → Funnels. There’s a column specifically for shortcodes.
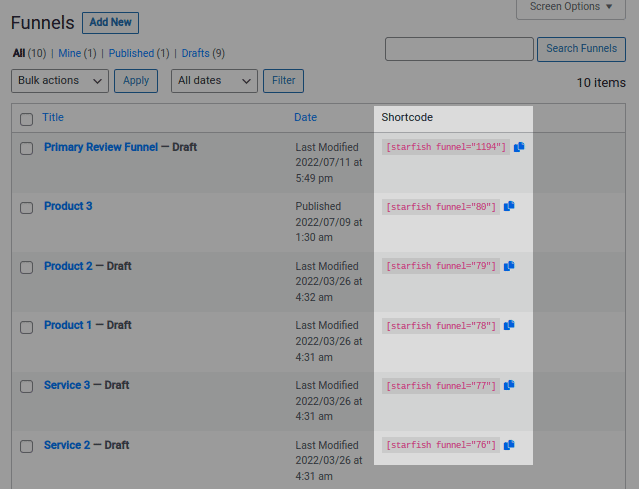
Click the blue button near your Funnel’s shortcode to copy it.
Here are a few different ways to use shortcodes in WordPress.
For the block editor (Gutenberg) and widget areas, use the Shortcode block:
For Elementor, use the Shortcode element:
For Beaver Builder and other page builders, use the Text or Text Editor module:
For the Classic Editor, simply paste your shortcode wherever you’d like it to appear in the content area:
Adding Your Shortcode to Existing Pages
We recommend adding a funnel to one of these locations:
- Homepage
- Contact page
- Sign-in page
- Sidebar
- Footer
Using the instructions above for inserting shortcodes in WordPress, you just need to pick a spot on the page, give it a simple heading, then paste your shortcode.
Your footer is a great option since it appears on almost every page of your website.
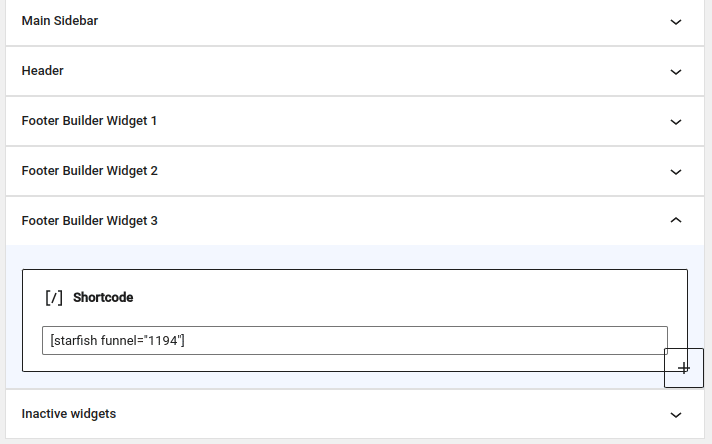
All you need to do is go to Appearance → Widgets, then use the Shortcode block in one of your theme’s footer widget areas:
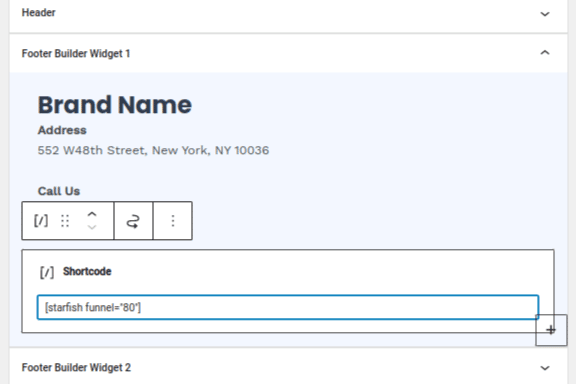
This will add your Funnel to your site’s footer.

How to Create a Dedicated Review Funnel Page
The best way to showcase a Review Funnel is on a dedicated Review Funnel page.
This lets you use review marketing strategies specifically made for your Review Funnel.
I used Elementor in the screenshots below.
Use Elementor’s blank page template if you’re doing the same. This removes your site’s header and footer from the page. Removing these distractions will keep your customer’s focus on your Funnel.
Other page builders have their own blank page templates.
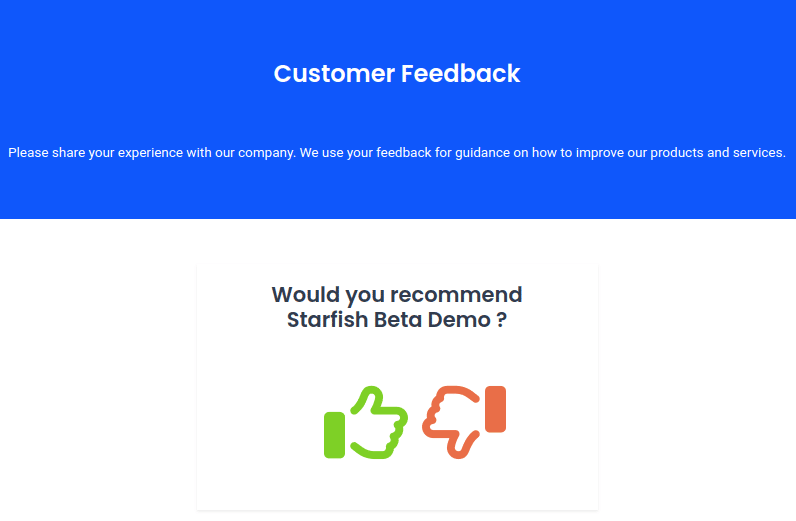
Start with a small stylized hero section that introduces your Funnel, like this:

This hero section contains a descriptive title as well as a brief explanation on how we plan on using each customer’s feedback.
Insert your Funnel’s shortcode so it displays next.
Add buttons, links and text for your company’s support details next. This includes:
- A button for your knowledge base or documentation.
- Button leading to your support forums.
- A button to create a ticket or email support.
- Text showcasing your support phone number. You can also use a “Call Us” button beside this for mobile users.
- Text displaying your live chat hours. Make sure your live chat or chatbot button is active on this page.

Having support information easily accessible will deter some customers from leaving negative reviews.
When you combine this section with the negative response functionality in your Review Funnel, you also have a higher chance of receiving valuable feedback from customers that will alert you of problems and inefficiencies in your business.
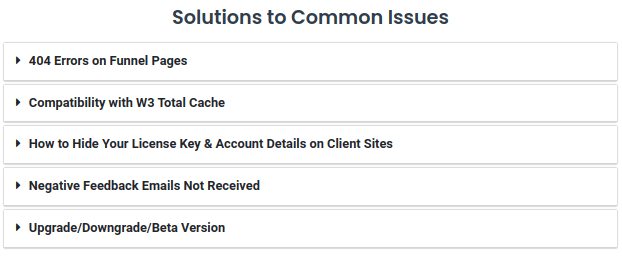
Next, create a list of FAQs for common issues customers have.
Like support information, having these solutions easily accessible will reduce the number of negative reviews your Funnel produces.
It may also reduce the number of support queries your staff receives.
Lastly, add some type of footer to the page, such as a small section that displays links to your social media accounts:

PDF Guide & Elementor Page Template
We’ve crafted a PDF copy of this page with details on each section. It’s a nifty little cheatsheet you can use as you design your own page.
We also created an Elementor template out of this page. All you need to do is install Elementor, upload the template to your site and import it into a page.
/*/* inline opt-in form here /*/*
Here are the steps for using an Elementor template.
Create a new page in WordPress, and choose Elementor’s Elementor Canvas template. This is the name of their blank page template.
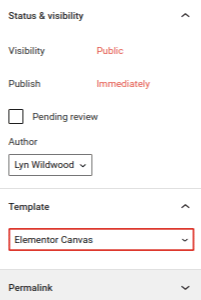
Click the Edit with Elementor button to open the page builder.
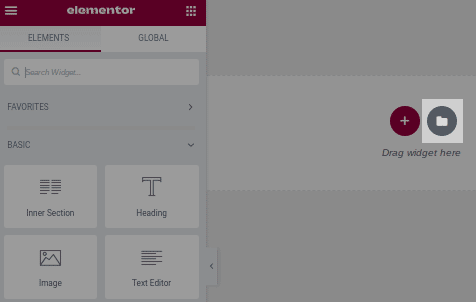
Then, click the Add Template button in the content area.
Click the Import Template button at the top of the window that pops up.
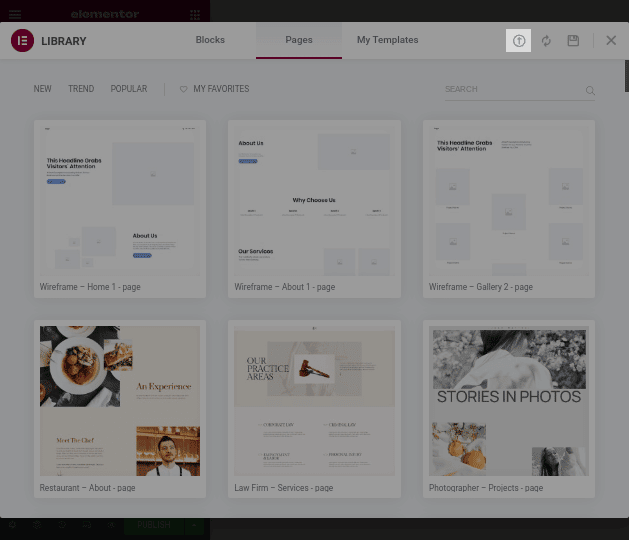
Select the JSON file you downloaded from us, and click the Insert Template button for it.
With the template imported, you can switch out the default text, styles and links for your own.



0 Comments