The Buffer social media poster is one of the most widely-used social media scheduling tools on the web.
It’s also one of the most affordable, which leads many to one simple question: time and time again: is Buffer worth it?
That’s one of the questions we want to answer in this post.
We’re mostly going to cover the app’s social media scheduling functionality, but we’ll delve into other topics as well here and there.
Let’s get started.
What is the Buffer Social Media Poster?
The Buffer social media poster is a core feature of Buffer’s social media application.
It lets you create and publish content for the web’s top social media platforms. These are Instagram, Facebook, TikTok, Twitter, Pinterest and LinkedIn.
The Buffer social media poster is also one of the most widely-used applications of its kind. Some of the company’s most noteworthy customers include Spotify, Shopify, Food52 and Huckberry.
Here’s a quick snapshot of everything the Buffer social media poster has to offer:
- Publish content to Instagram, Facebook, Twitter, Pinterest, TikTok and LinkedIn.
- Create posts for multiple platforms from a single draft.
- Schedule posts in advance.
- Queue up content on an automated schedule.
- View your social media schedule in a calendar.
- Create a Shop Grid for your products that looks like your Instagram feed.
- Include a first comment on Instagram posts.
- Create reminders to let yourself know when to post Instagram Stories and TikTok videos.
- Add feedback to drafts created by other members of your team.
- Hold posts created by team members for approval before publishing.
- Create a landing page for your brand, similar to a “link in bio” page.
- Create shortlinks with Buffer’s own link shortener tool.
- Build campaigns across multiple posts and social media channels.
- Tag other users and add your location while you schedule Instagram posts.
- Create and save hashtags to reuse later for Instagram.
- Promote your latest blog posts to social media automatically with a WordPress integration.
- Import images from Canva.
- Recycle old posts automatically via a SocialBee integration.
Let’s see this tool in action.
A Closer Look at the Buffer Social Media Poster
The Buffer social media poster functionality rests within the Publishing tab of the application.
You can schedule posts and see different views of all of the posts you’ve queued up for publishing.
We’re going to take a look at all of the functionalities within this feature:
- The Buffer social media calendar.
- Connecting channels.
- Editing your posting schedule.
- Scheduling posts.
- Campaigns.
Let’s start at the top.
The Buffer Social Media Calendar
Buffer doesn’t have a “home” screen. You’re taken to the Queue screen instead upon logging in.
This screen shows all of the upcoming posts you’ve scheduled in the app. You can switch between daily, weekly and monthly views as well as change the time zone without affecting the time zone assigned to your entire account.
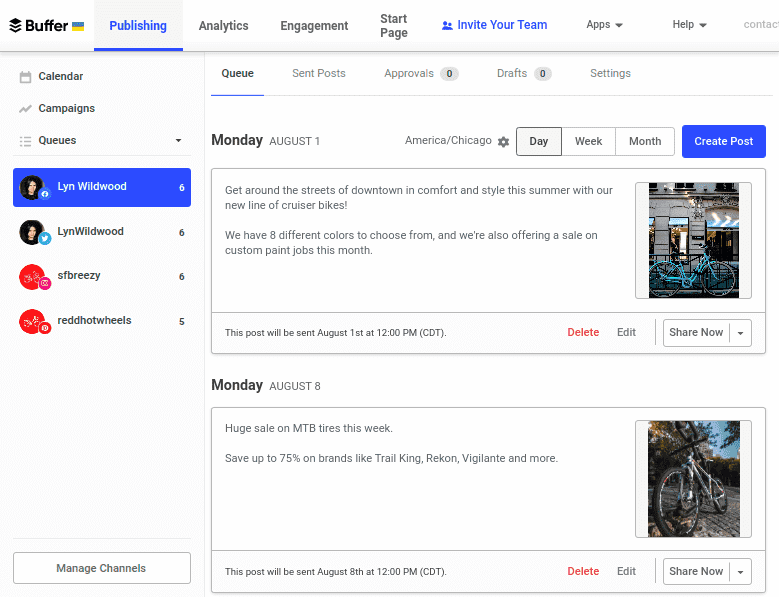
The Queue screen does not show all of the posts you’ve scheduled across all accounts on one screen. You need to switch between each platform from the left-hand sidebar instead.
Fortunately, Buffer also has a Calendar screen that gives you a snapshot of every post you’ve scheduled across all platforms.
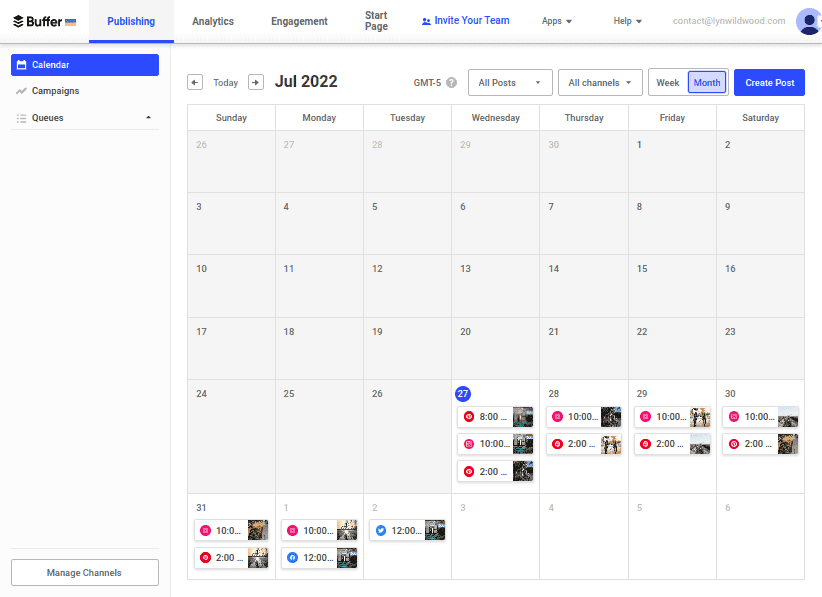
You can filter this view by post status, social media platform, and weekly and monthly views.
Each individual post also has a set of function buttons you can use to edit its status:
- Share now
- Move to drafts
- Edit
- Delete
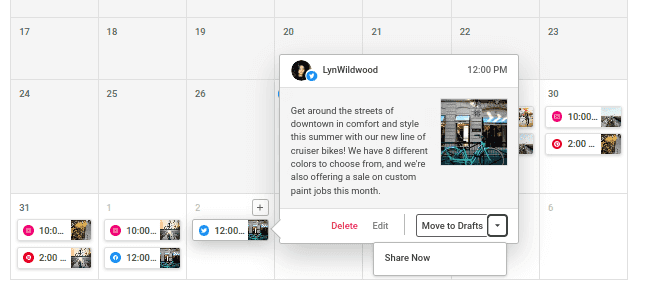
Overall, the Queue and Calendar screens have wonderful user interface (UI) designs that are intuitive and easy to decipher.
They give you a nice, clean visual representation of everything you and your team have planned as far as social media goes.
The only change I’d make is being able to see posts you’ve scheduled for more than one social media platform on the Queue screen rather than one at a time.
For now, let’s talk about how to get to the point where your Buffer social media calendar is filled out as it won’t look like this when you sign in for the first time.
You need to connect your profiles to the app first, then edit your posting schedule before finally scheduling your first few posts.
I’m going to cover each step.
Connecting Channels
Connecting channels is easy in Buffer and only requires a small amount of clicks.
Buffer will have you connect channels when you log in for the first time. After that, you can go to Manage Channels from the Publishing tab.
There’s a “Connect Channel” button that enables you to integrate new profiles with Buffer.
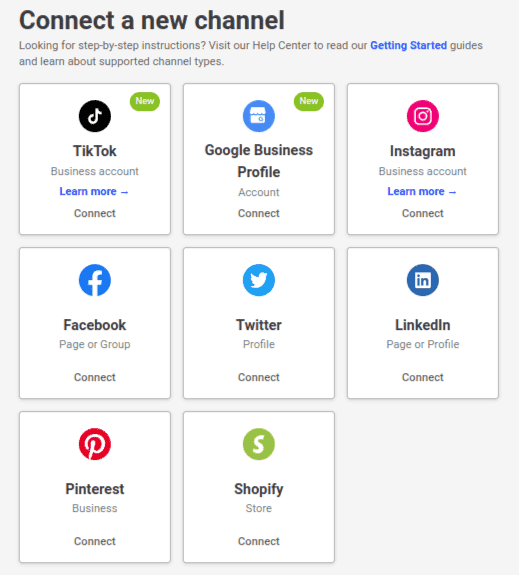
All you need to do is select the platform you want to connect, sign into that platform and allow the integration.
The number of profiles you can connect varies depending on which plan you have. More on that later.
Editing Your Posting Schedule
The posting schedule feature is really useful, and the UI is well laid out.
You can enable and disable specific days of the week for posting. So, if you only want to publish to Twitter on Fridays, disable Saturday-Thursday.
You can also add one or more posting times to each day.
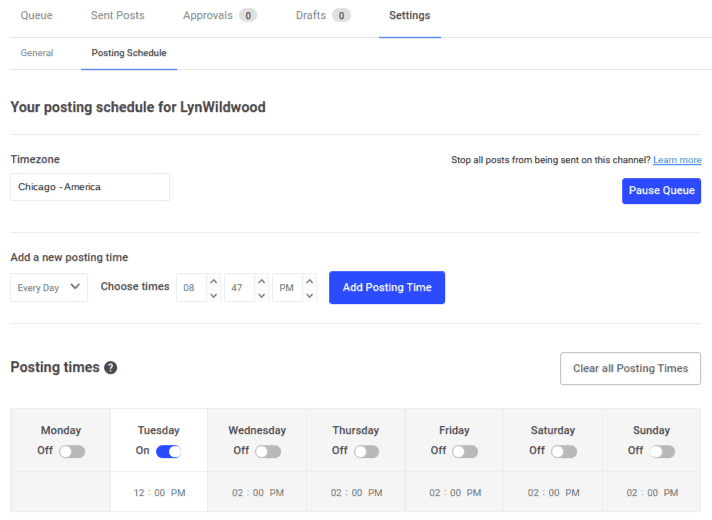
There are also two really useful quick-use buttons. One enables you to pause scheduling for a specific social media channel.
The other clears every posting time you’ve added to a channel in one click.
What makes the posting schedule truly useful is the way in which the Buffer social media poster follows it automatically when you schedule new posts.
This means you won’t need to choose a schedule time when you create new posts in Buffer. The app will fill the next available timeslot for your chosen platform automatically.
The posting schedule feature is a bit tedious as of right now. To edit your schedule for a particular platform, you have to choose that platform in the left-hand sidebar, click Settings, then finally click Posting Schedule.
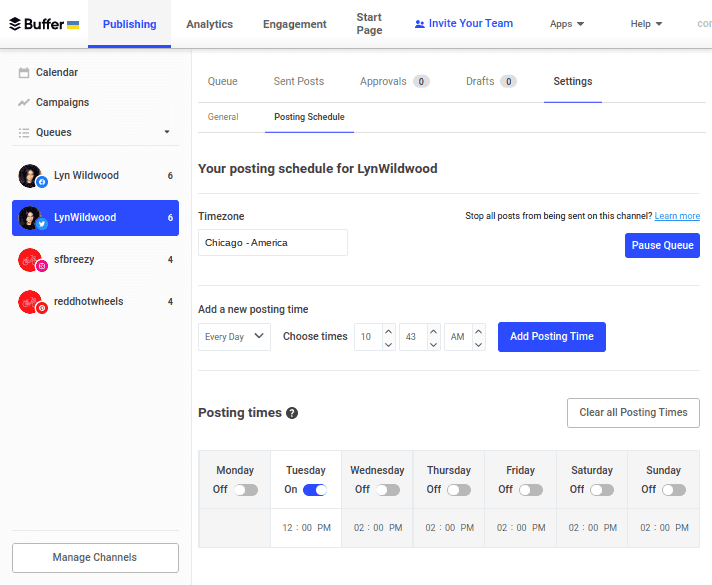
This is fine, but when you want to edit your schedule for a different platform, you have to click through Settings → Posting Schedule again.
You also can’t apply the posting schedule you create for one platform to other platforms.
This isn’t a huge problem, but it may make the app a little tedious for those with simpler social media marketing strategies.
Overall, the posting schedule is a powerful addition to Buffer’s simple social media marketing app.
Scheduling Posts
Let’s talk about the focus of this article: the Buffer social media poster.
To schedule a new post from the Publishing tab, we go to Calendar → Create Post.
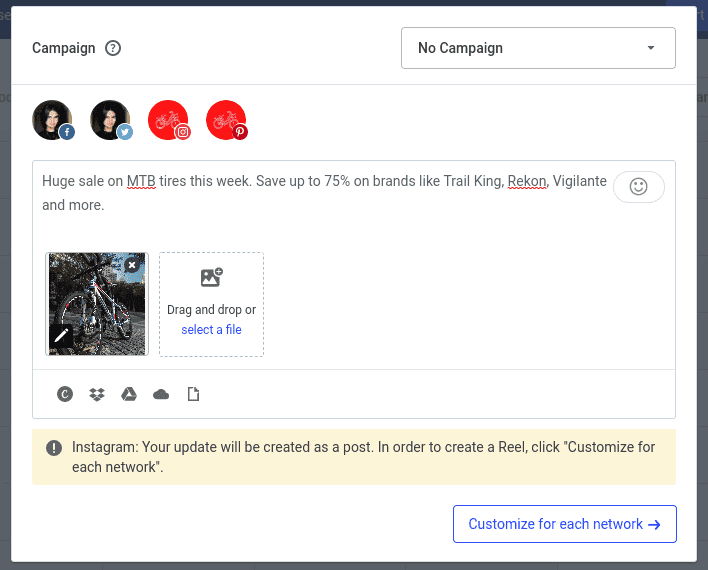
You start by selecting the platforms you want to schedule your post for.
Then, write your post and add an image or video. You can add emojis as well.
Unfortunately, Buffer does not auto crop your images for Instagram.
If you upload an image outside of the aspect ratio range Instagram accepts, you’ll get a warning that says “To post images to Instagram with aspect ratio outside the 4:5 to 1:91:1 range, you’ll need to set up Reminders.”
This means Buffer will send a reminder to your phone to let you know when to publish this post to Instagram, which you’ll have to do manually from the app.
If you want to avoid having to do this, follow these ratio guidelines:
- 1:1 ratio for square images.
- 4:5 ratio for verticals.
- 1.91:1 ratio for horizontal images.
I did not receive an alert when uploading vertical images with a dimension of 1080 x 1350px, for reference’s sake.
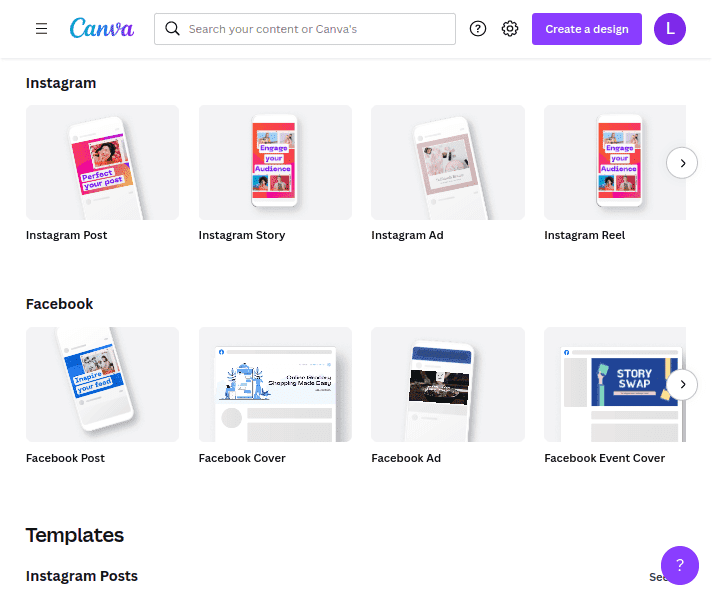
If you’re not using images taken directly from a phone, I recommend using a graphic design app like Canva.
It has templates for different social media platforms that have preset dimensions each platform accepts.
Optimizing Your Post for Different Platforms
After you create an initial post and choose which platforms you’d like to publish it to, you can optimize it for each individual platform.
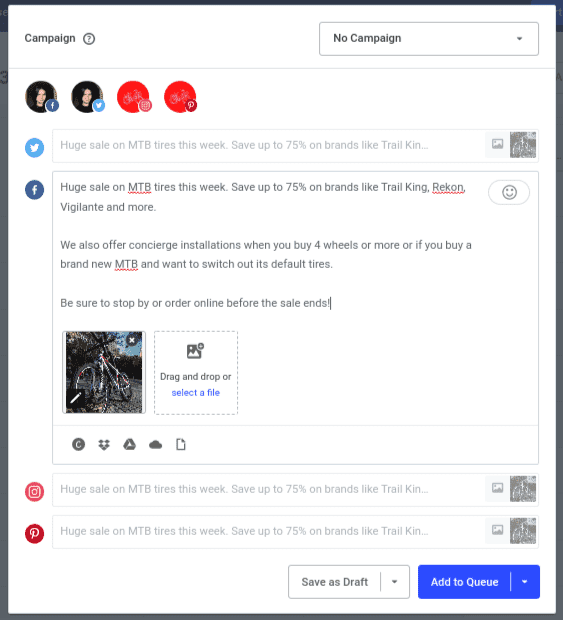
For instance, Twitter’s character limit for a tweet is 280 characters. The UI of the Buffer social media poster has a character counter for Twitter that lets you know when you hit that limit.
For Instagram, you can add a first comment, a location and your Shop Grid URL (if you use that Buffer feature).
You can also open the hashtag manager and create a hashtag group. This enables you to build lists of hashtags you’re likely to reuse on future posts.
You can add up to 30 hashtags to a group.
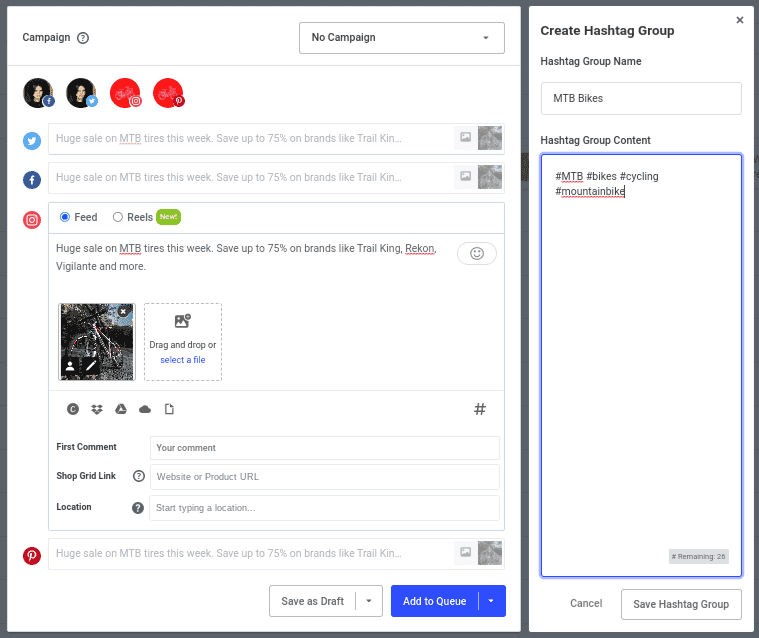
Hashtags are appended to the end of a post when you insert a group.
Unfortunately, Buffer doesn’t include stats for hashtags nor do they offer suggestions. You’ll have to do your own research on which hashtags are best to use.
Other Scheduling Features
We’ve already talked about the quick-use button Buffer has (the “Share Now” button) for times when you want to publish a post immediately.
There are other ways to change things up in the app as well.
For instance, you can add a new post to any day from the Calendar view.
Just hover over a day, and click the plus + symbol. You can edit a post’s scheduled date and time manually when you do it this way.
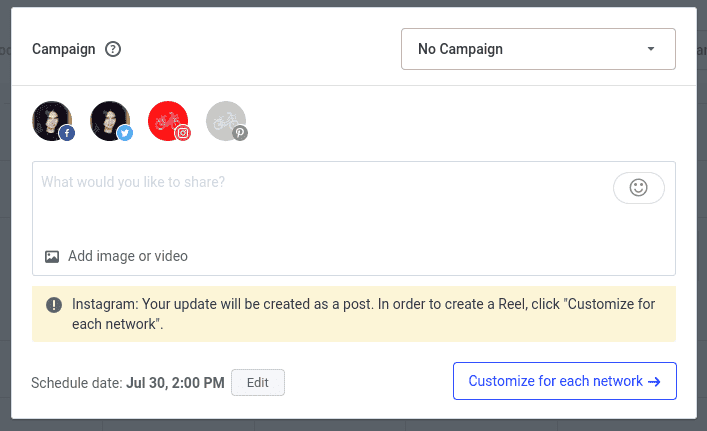
If you go back to the Queue, you can rearrange any post by dragging it to a new location.
Also, when you have a lot of posts scheduled that aren’t time-sensitive (such as sale promotions), you can use the Shuffle Queue feature.
This rearranges the posting order of your next 200 posts at random.
The feature is buried a little. You have to go to Settings → General → Shuffle Queue.
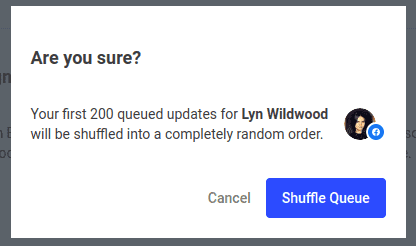
Like the posting schedule, you can only shuffle your queue per channel, which can be tedious if you want to shuffle all of your posts.
This feature also reveals a different feature the Buffer social media poster lacks: categories and tags.
You can’t organize posts by grouping them into categories or applying tags to them.
This can make it difficult to keep track of the different types of posts you publish to social media, such as announcements, sale promotions, new content promos and more.
This is why SocialBee is a great integration for Buffer. It allows you to organize posts into categories.
You can even create “evergreen” categories. Any post you add to this type of category will get re-shared at a later date, ensuring you always have something to share on post day.
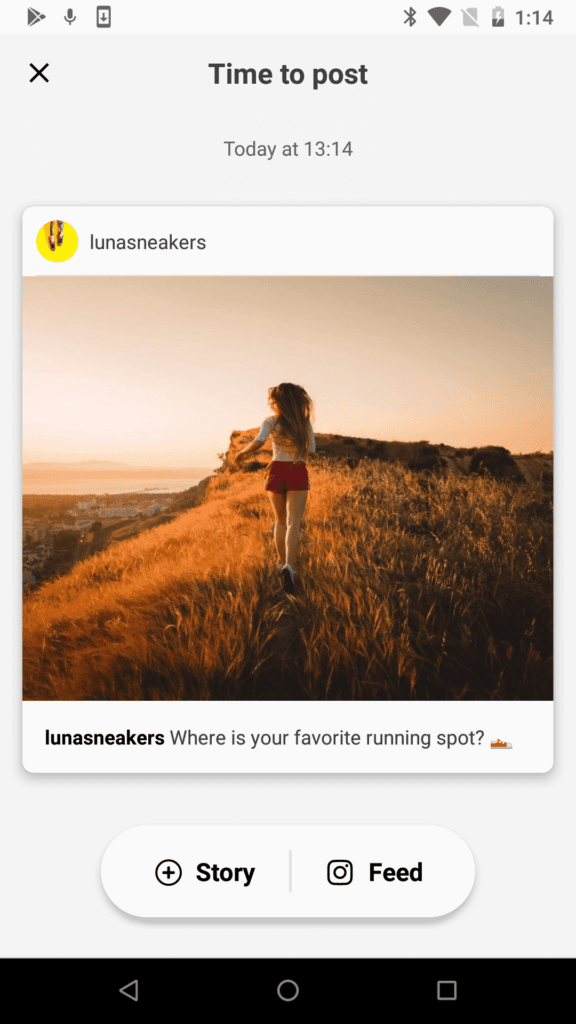
Lastly, let’s talk about reminders. You’ll need to install the Buffer app on your phone to use this feature.
Like I said before, post reminders are sent when you want to schedule an Instagram Story or an image outside of the platform’s accepted aspect ratio range.
Here’s how this works: you schedule a post in Buffer like usual. However, posts that require reminders do not publish automatically like every other post you schedule with Buffer does.
When the time comes, you’ll receive a push notification from the Buffer app on your phone instead.
This notification is a reminder letting you know the post needs to be published.
Clicking the notification takes you to the Buffer app at first. However, you can click “Open in Instagram” on iOS and schedule from there.
Android users can schedule the post directly from the Buffer app.
Source: Buffer
Before we move on, it’s important to note that this is not a limitation within Buffer itself.
It has to do with Instagram’s API and is a common workaround you’ll find among most social media scheduling apps.
Campaigns
Campaigns are one of the coolest features Buffer offers.
They allow you to set up a series of posts that all relate to the same social media strategy. You can then review analytics for that strategy.
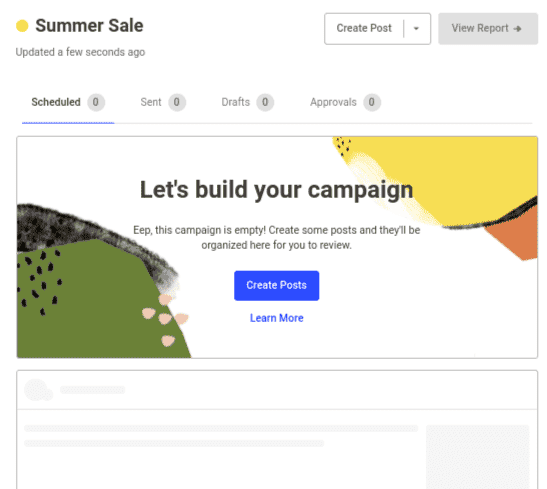
A good use case scenario for this feature would be a summer sale. You could create a campaign within Buffer named “Summer Sale,” then create social media posts promoting that sale and add them to the campaign you created.
You probably noticed the “No Campaign” option in some of the screenshots above. Well, when you create campaigns, you can add new posts to them.
That’s one way you can fill a campaign with posts. You can also add posts manually after you create a campaign.
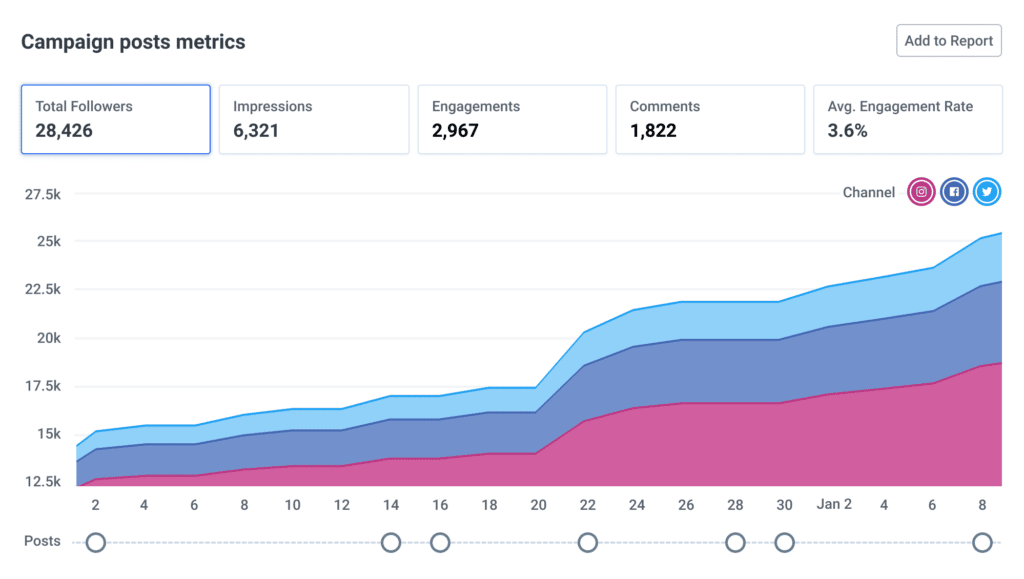
As far as analytics go, here are the metrics Buffer collects for you in a simple, well-designed graph:
- Total followers
- Impressions
- Engagements
- Comments
- Average engagement rate
Data from all channels appears on this graph with each channel getting its own color.
Source: Buffer
It should be noted that any post type you can create with Buffer can be added to a campaign.
However, only data from specific channels will appear in reports.
Those channels are Facebook pages, Instagram business accounts, Twitter profiles and LinkedIn pages.
Posts created for Facebook profiles, LinkedIn profiles and Pinterest boards will not be included in the metrics within your campaign’s analytics nor will Instagram posts that require reminders.
Even so, Buffer Campaigns is a really nifty feature of the Buffer social media poster.
Its simple layout is in line with the rest of the app’s UI, and it’ll help you become more tenacious with your overall social media marketing strategy.
A Quick Look at Buffer’s Other Features
Now that we’ve looked at the Buffer social media poster, let’s briefly touch base on some of the other features the app offers.
Buffer has the Analytics tab you can use to keep an eye on the performance of your posts.
It starts with an overview featuring metrics for all of your connected social media channels combined. Those metrics are Total Audience, Total Impressions and Total Engagement.
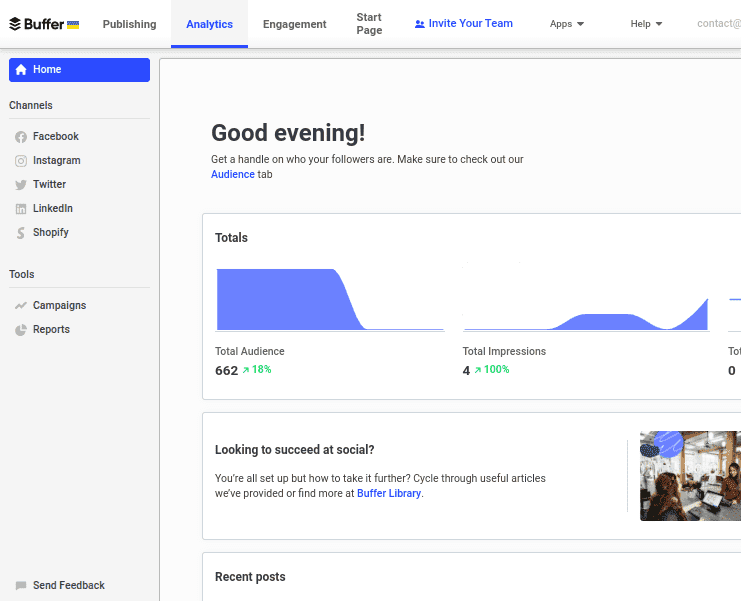
Each metric is paired with a percentage representing your gains and losses.
There are also analytics for each individual channel.
They’re broken up into a few different tabs, including an Answers tab that contains details on which days and times your audience is most likely to engage.
Finally, the Engagement tab lets you keep track of and respond to comments while the Start Page is a simple landing page you can use in place of link-in-bio tools.
Buffer Social Media Poster Pricing
Buffer has multiple plans to choose from.
Their pricing structure is based on a few things:
- The number of social media profiles you want to publish to.
- How many posts you need to schedule per month.
- The number of team members you need.
It starts with a free plan that lets you schedule up to 10 posts per month per channel to up to 3 channels. It only includes support for a single user.
The free plan excludes a lot of features available in premium plans. These include the link shortener, the Instagram first comment feature, hashtag management, scheduling for Stories and more.
Analytics and engagement features are also excluded from the free plan.
Pricing for premium plans starts at $6/month per channel for the single-user plan and $12/month per channel for the multi-user plan.
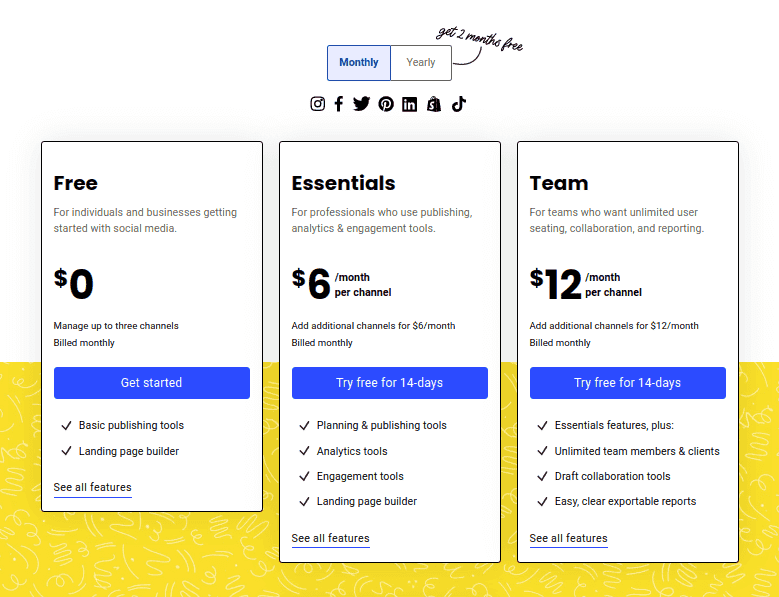
There’s also an agency plan for social media management companies. This costs $120/month.
Be sure to pair this with our own Agency plan if you operate your own online reputation management agency.
All Buffer plans come with 2 months free when you pay annually.
Final Thoughts on the Buffer Social Media Poster
Buffer is one of the most popular social media scheduling apps, and for good reason, too.
It’s affordable and incredibly easy to use, making it perfect for small businesses who don’t spend enough time on social media to justify spending the money on more robust tools.
Buffer does have its downfalls here and there that mainly have to do with how simple the app is.
If you really want to ramp up your social media game, try a tool like Agorapulse instead. It offers social media inbox features, scheduling, monitoring and analyzing.
You can also use SocialBee on its own for social media scheduling. Its pricing is similar to Buffer’s.
Just be mindful that it doesn’t have inbox features or campaigns.
You can get started with Buffer for free. Its premium plans have a free trial as well.




Thanks for this information bro